You might be wondering what happens if you disable Task Manager in Windows. Well, whenever someone tries to open Task Manager as a user (not an admin) after you disable it, it will show that the ‘Task Manager has been disabled by your administrator.’ Well, here’s how to do it.
Method 1: Disable Task Manager Using Command Line or Powershell
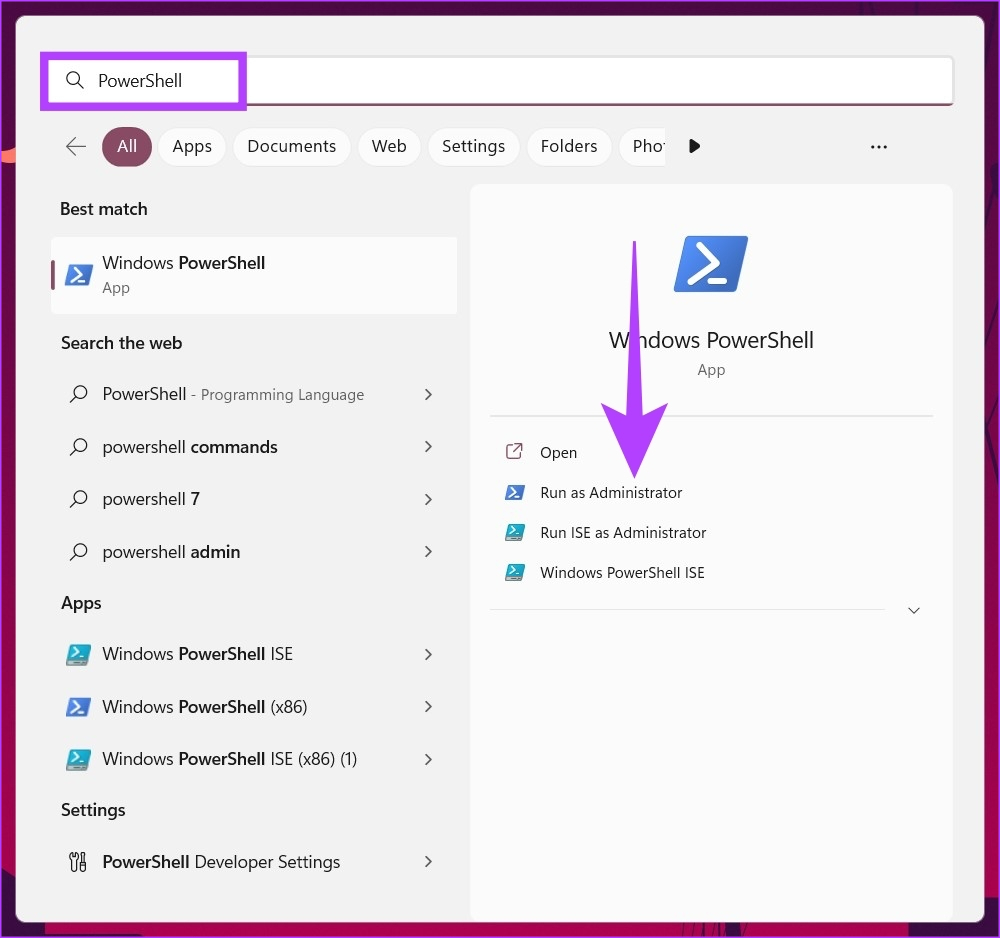
This is a fairly simple way to disable Task Manager for specific users in Windows. Here’s a step-by-step process. Step 1: Press the Windows key on your keyboard, type PowerShell or Command Prompt, and click on ‘Run as administrator.’ Note: For the sake of this article, we will go with PowerShell.
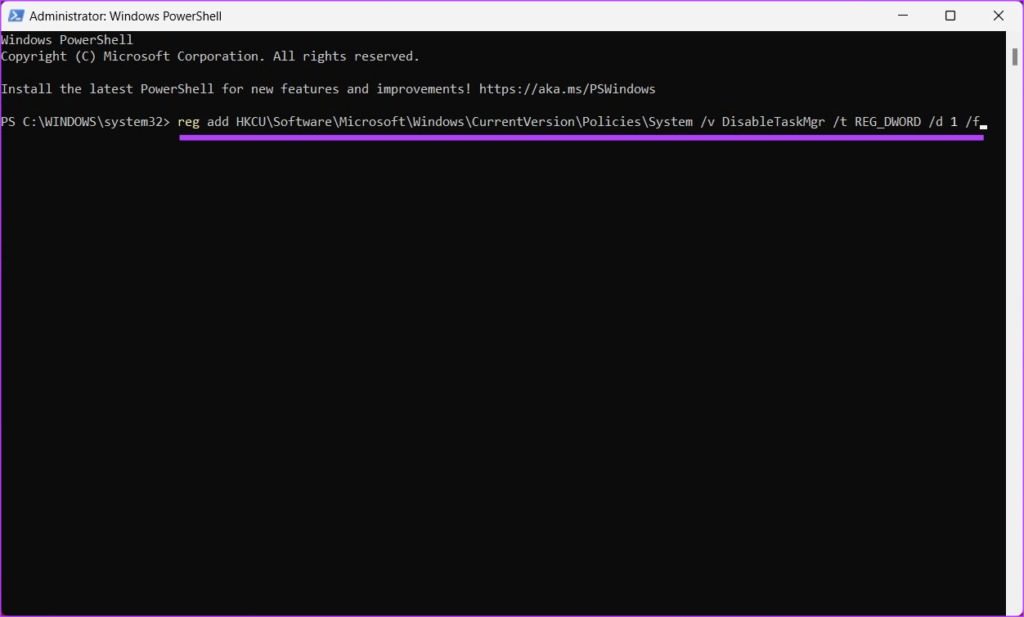
In the prompt, click Yes. Step 2: Type the following command and press Enter.
That’s it. The Task Manager gets disabled. If you want to enable Task Manager, type the below command.
Your Windows Task Manager is back to normal now. Follow along if you want to disable Task Manager using a different method.
Method 2: How to Disable Task Manager Using Registry Editor
This step isn’t as straightforward as the above one but the steps are fairly simple to follow and execute. However, because we will be using Registry Editor, we strongly advise you to back up the Windows Registry before proceeding with the steps below. To disable Task Manager for a specific user, you need open Registry Editor as an admin in that standard account. Here’s how. Step 1: Press the Windows key on your keyboard, type Registry Editor, and click ‘Run as administrator.’ Note: You can also press ‘Windows key + R’ to open the Run dialog box, type regedit.exe, and click OK to open Registry Editor.
In the prompt, select Yes. Step 2: In the top address bar, enter the mentioned address. Note: You can manually navigate to the section too.
Step 3: Under the System folder, right-click, select New, and choose ‘DWORD (32-bit) Value.’
Step 4: Type DisableTaskMgr in the name field.
Step 5: Double-click the new value, type 1 in the Value Data field, and press OK.
Finally, reboot the system to implement the changes. And that’s it! When the system boots back, the Task Manager will be disabled. If you don’t want to disable Task Manager from the registry, you can go with the Group Policy editor.
Method 3: Use Group Policy Editor to Prevent Access to Task Manager
Local Group Policy Editor helps you control Windows. Thus, you can also use it to enable and disable Task Manager. Here’s how to turn off Task Manager for specific users in Windows. Note: Group Policy Editor is only available for Windows 11 Pro and Enterprise versions. You can skip this method if you are on Windows 11 Home Edition. Step 1: Press the Windows keys on your keyboard, type gpedit.msc, and click Open. Note: You can also press ‘Windows key + R’ to open the Run dialog box, type gpedit.msc, and click OK.
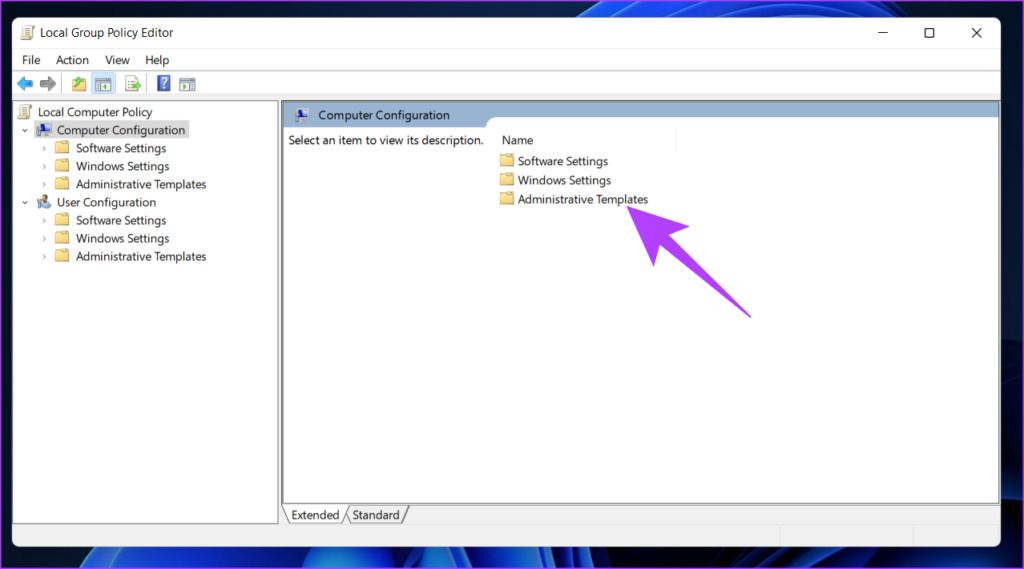
Step 2: In the left pane, under ‘Local Computer Policy,’ select Computer Configuration.
Step 3: In the right pane, double-click on Administrative Templates.
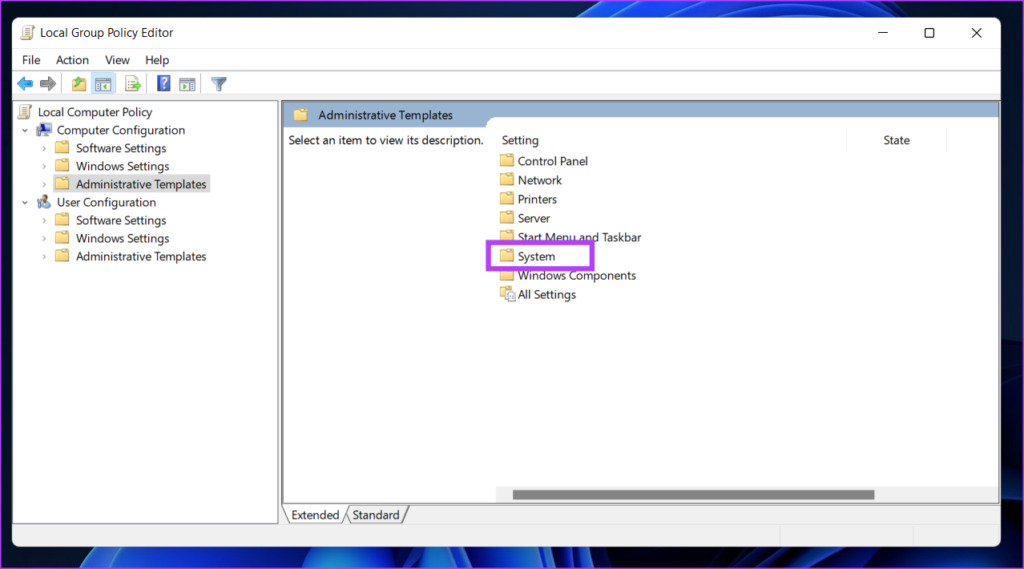
Step 4: Select the System option.
Step 5: Under the System option, locate ‘Ctrl+Alt+Del Options’ in the sidebar, go to ‘Remove Task Manager’ on the right, and double-click on it.
Step 6: Under the ‘Remove Task Manager’ window, select the Enabled option. Finally, click on Apply and then OK.
There you go. Now, all you need to do is reboot Windows. And once it boots back up, you will not be able to open Task Manager again. Whenever you try to open it, an error message will pop up. If you want to roll back to normal mode, under the ‘Remove Task Manager’ policy, select the ‘Not Configured’ option and click Apply followed by OK.
Take Control of Your Windows System
All the different methods mentioned above will help you disable Task Manager for specific users in Windows. Now that you have gone through this, let us know why you wanted to disable Task Manager in the comment section below. The above article may contain affiliate links which help support Guiding Tech. However, it does not affect our editorial integrity. The content remains unbiased and authentic.
