In this post, we’ll share the steps necessary to change the default download location on Windows 11 for various file types. So, without further ado, let’s get right into it.
Change Default Download Location for Apps, Documents, and Media
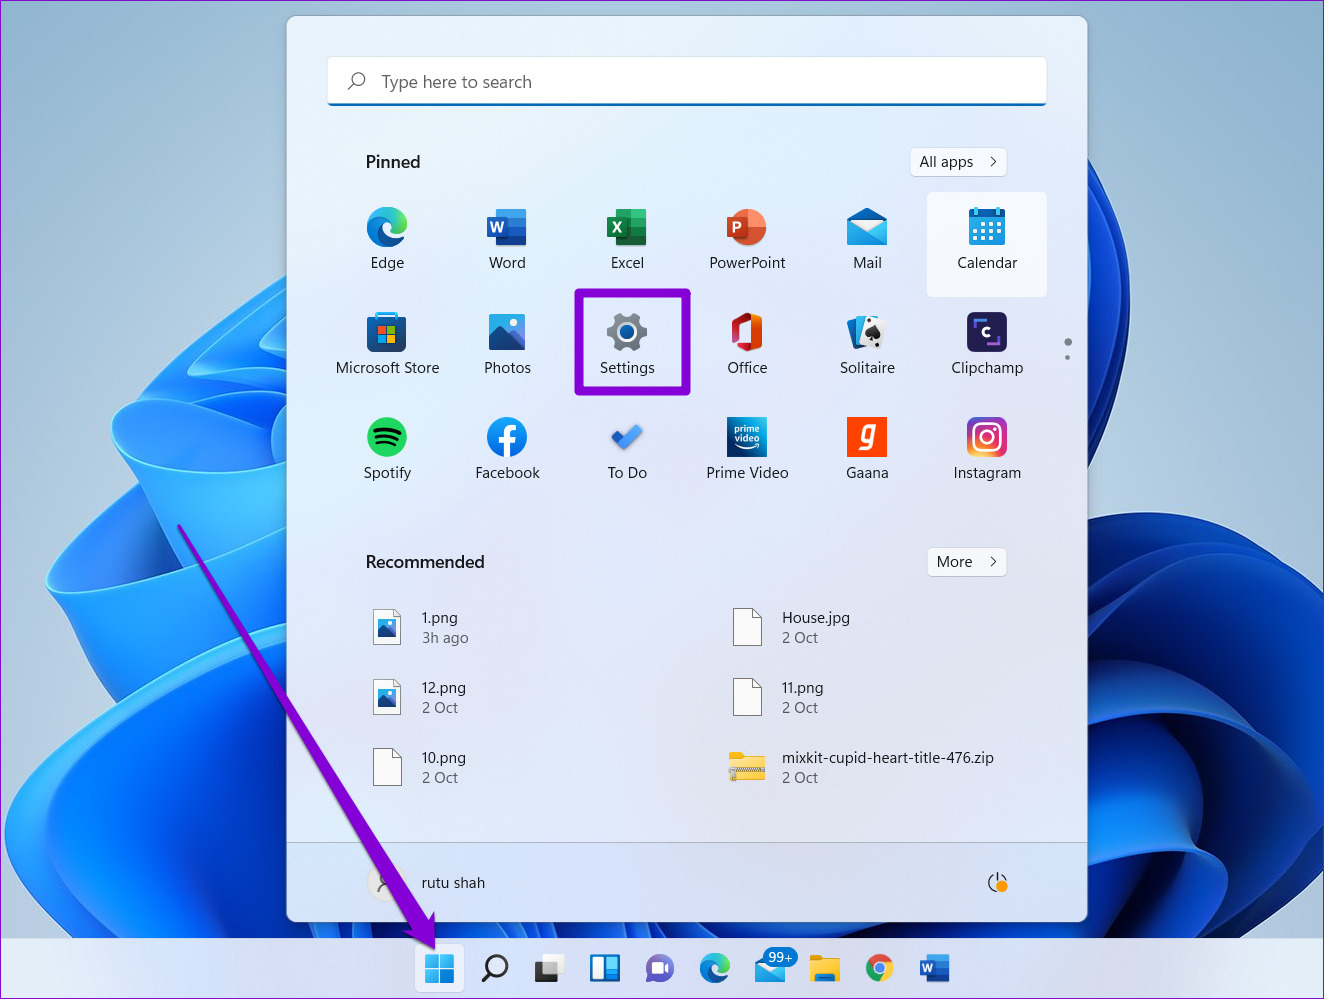
By default, Windows 11 stores all downloads – apps, documents, media, and other important files to the local drive. Over time, the primary storage my run out of space or you’d like to store specific files in a different drive. Then, changing their default download location is a good idea. Here’s how you do it. Step 1: Click on the Start button to open the menu. Click on the Settings app icon (cog-shaped icon) to launch it. Alternatively, you can also press the Windows key + I to achieve the same.
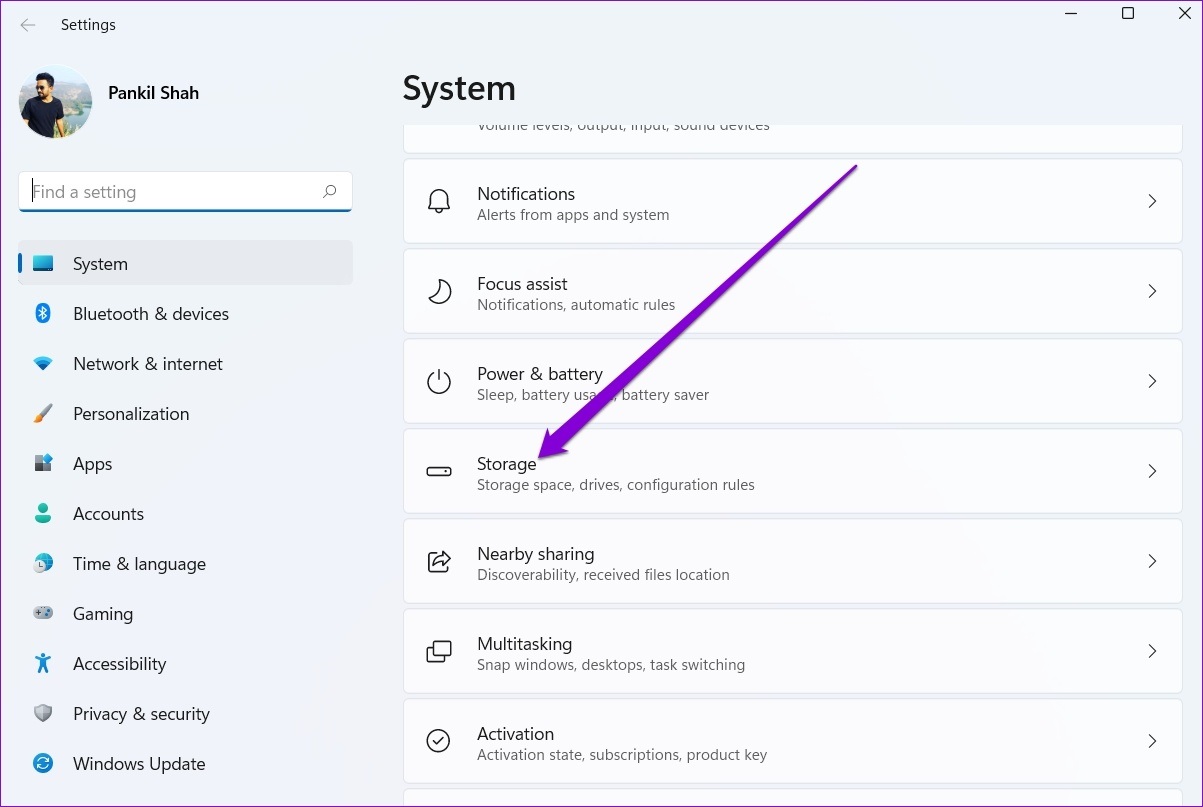
Step 2: On the System tab, select Storage on the right pane.
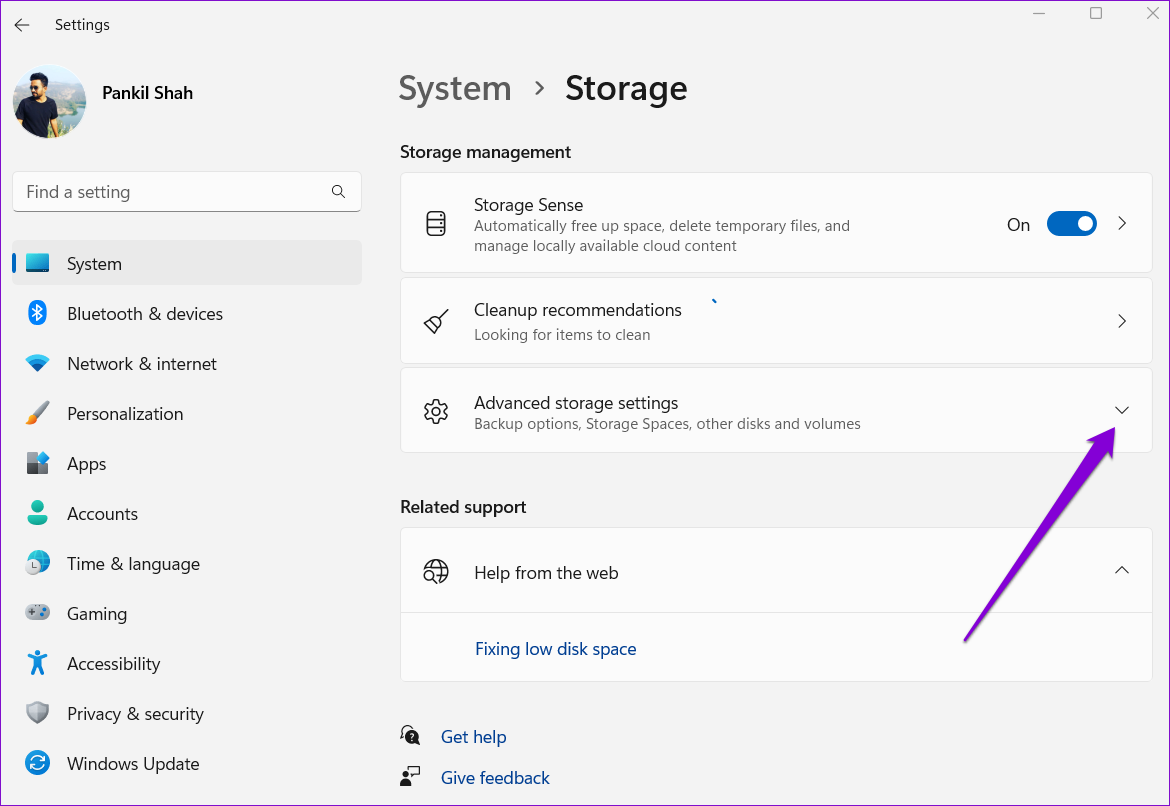
Step 3: Under the Storage management section, click on the downward arrow next to ‘Advanced storage settings’ to expand it.
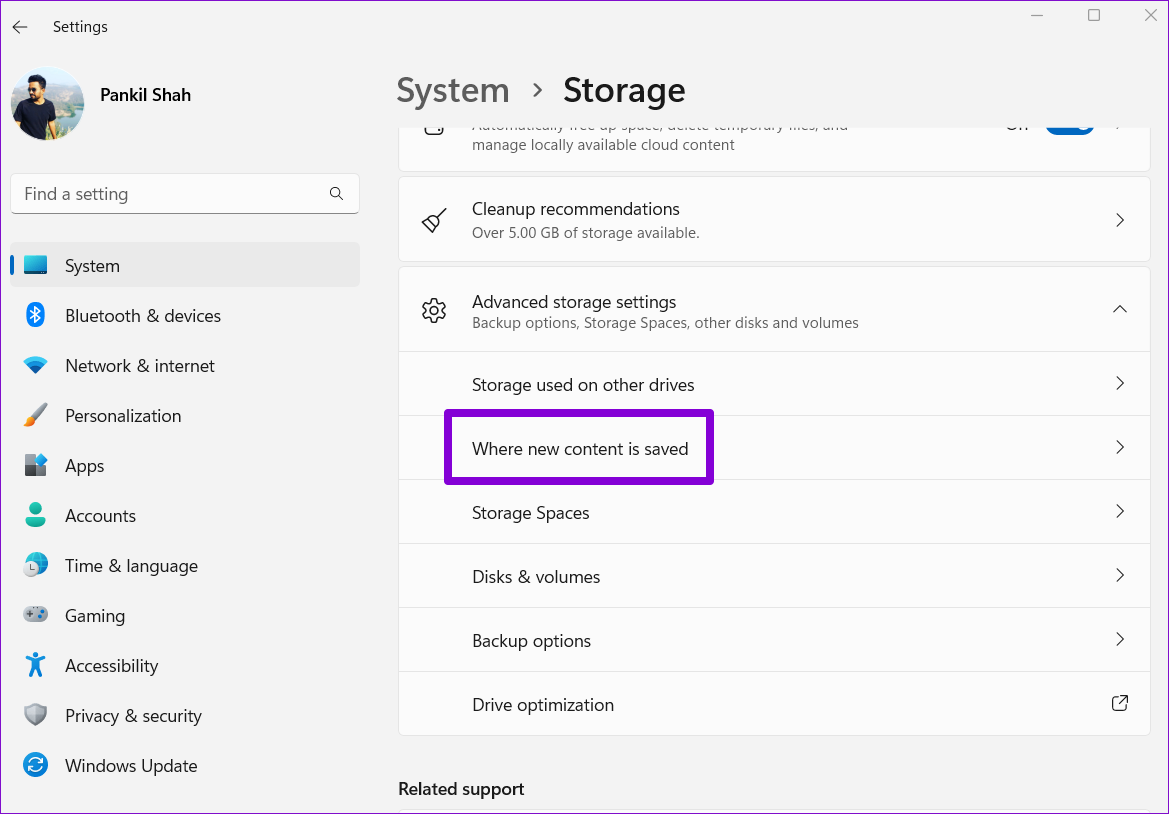
Step 4: Select ‘Where new content is saved.’
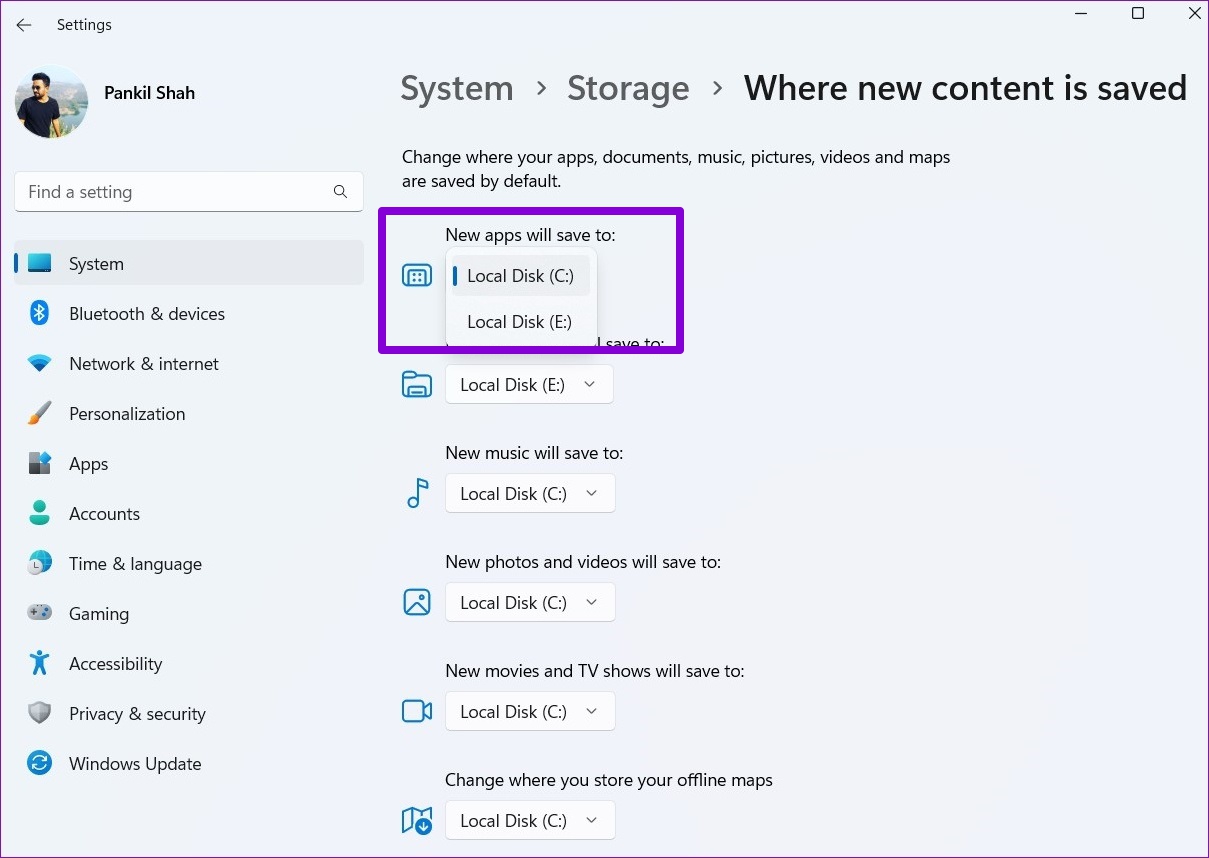
Step 5: You’ll find current download locations for your apps, documents, music, pictures, videos, and offline maps. To change the default download location for a file type, use the drop-down menu and select a different drive.
Step 6: Lastly, hit Apply to save changes.
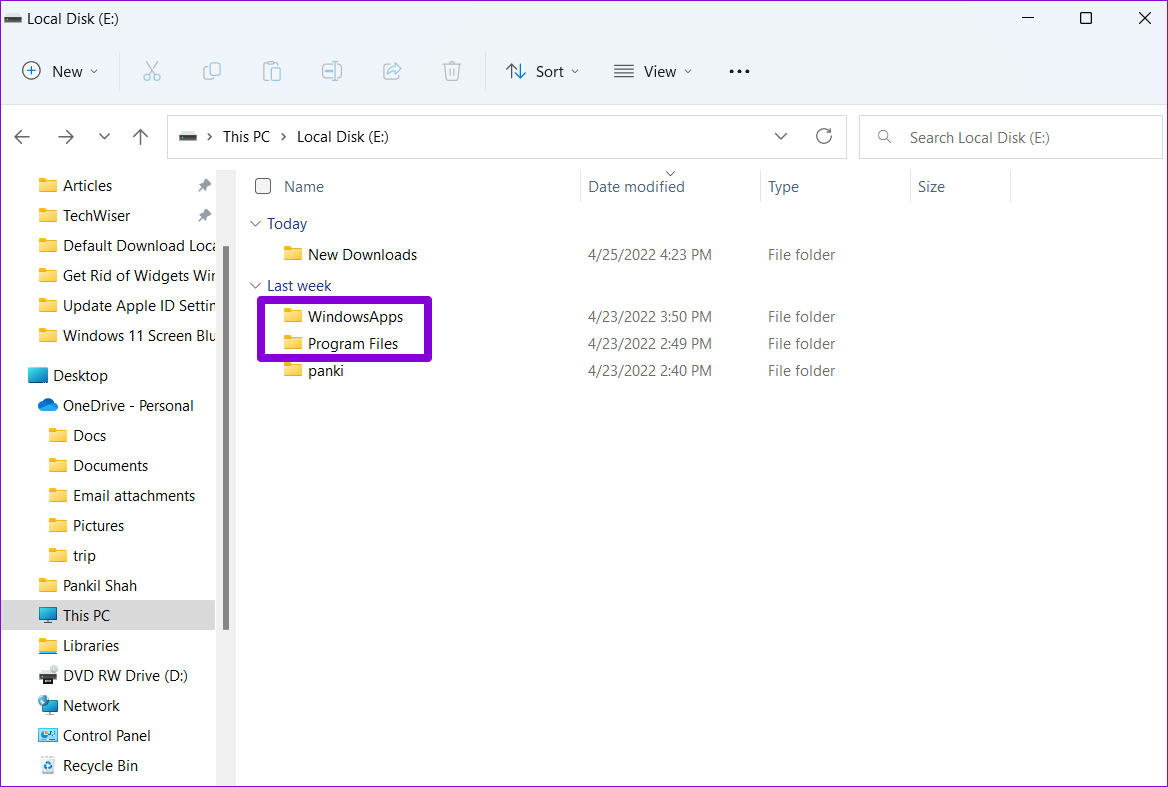
Similarly, you can repeat the above steps to change the default download location for specific file types. Windows will automatically create new folders inside the selected drive as you make the changes. For instance, if you change the default download location for Microsoft Store apps, Windows will create the Program Files and Windows Apps folder in your new drive.
It’s important to know that while you can assign different drives for various file types, you can’t define a specific folder for them.
How to Move Downloads Folder to a Different Drive
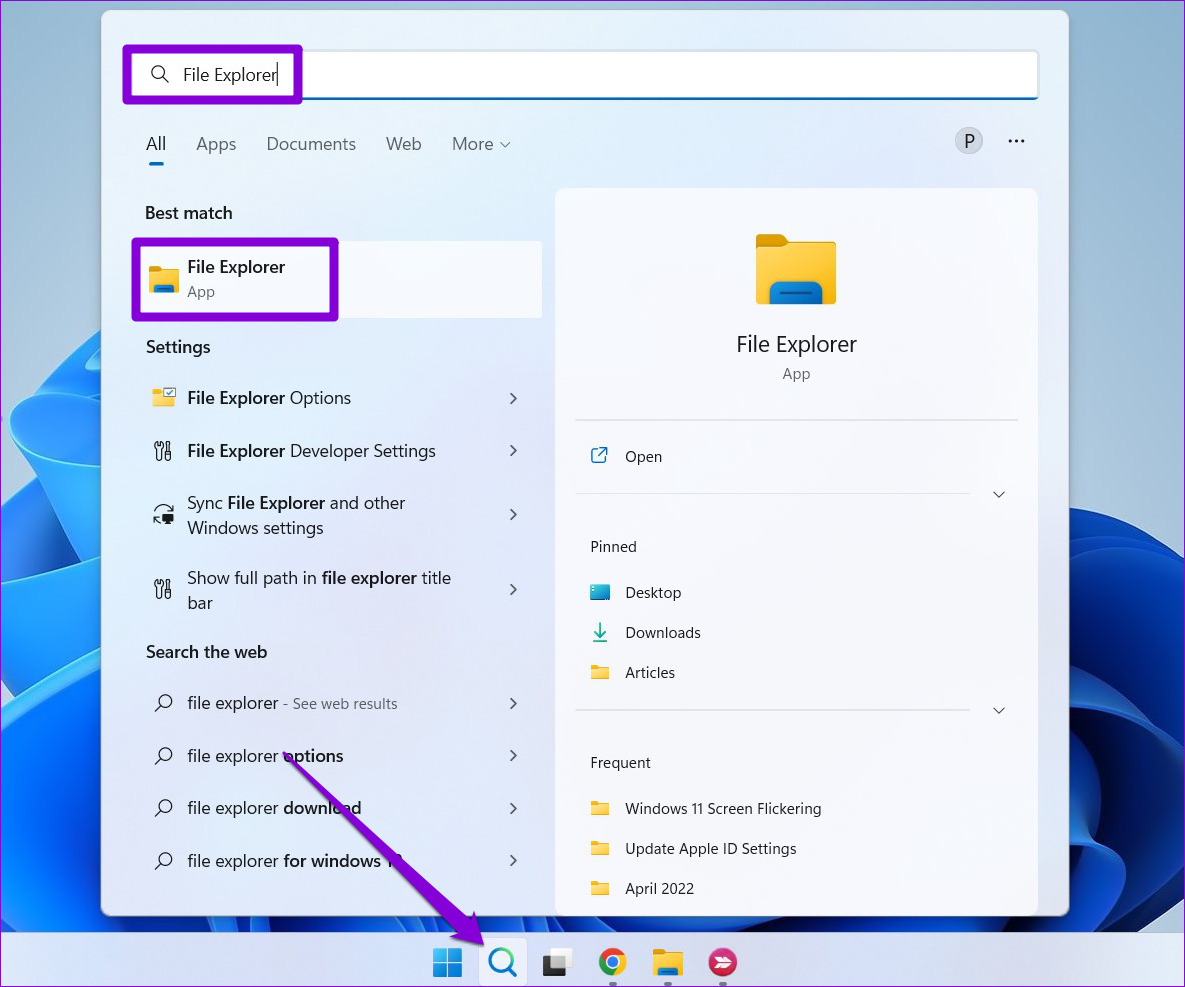
By default, Windows saves files you download from the internet in the Downloads folder. Usually, it’s located in the drive where you’ve installed Windows. You can easily relocate the Downloads folder to a different drive. Here’s how. Step 1: Click on the search icon on the Taskbar or press Windows key + S to open the Search menu. Type file explorer in the search box and select the first result that appears.
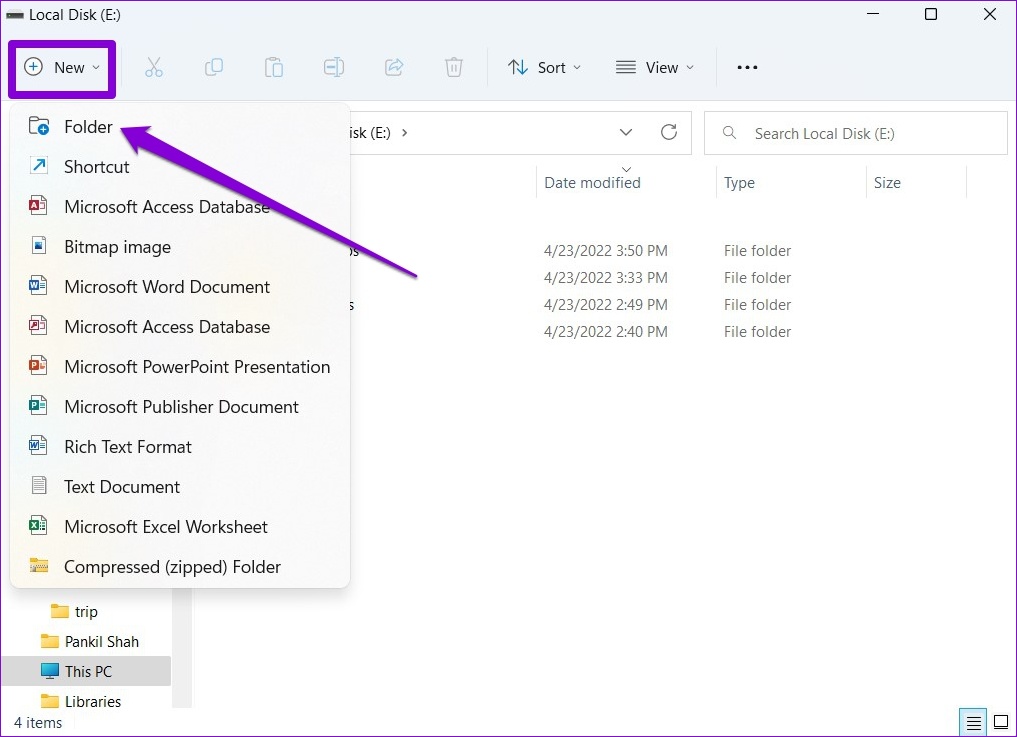
Alternatively, you can also press the Windows key + E to launch the File Explorer quickly. Step 2: Navigate to the drive or preferred folder location where you’d like to save your downloads. Step 3: Click on New in the top left corner and select Folder from the list. Give your folder a suitable name.
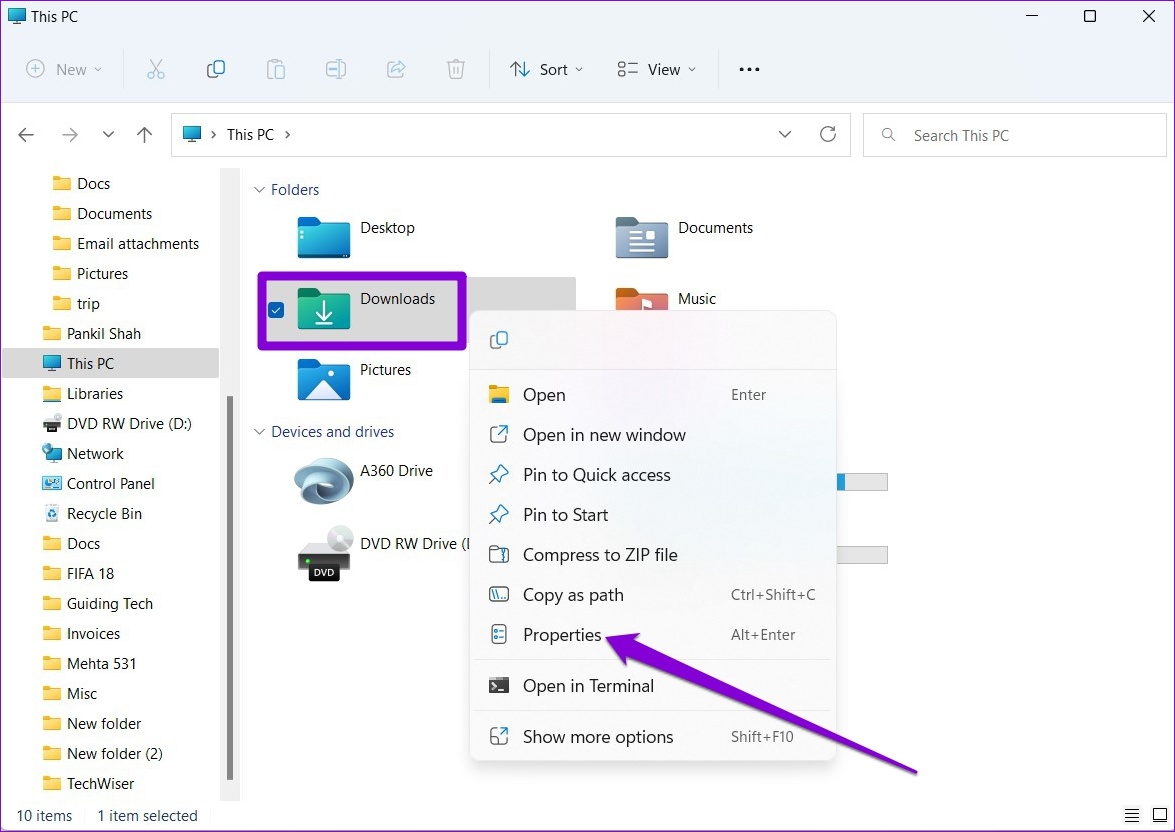
Step 4: Use the left pane to navigate to This PC. Right-click on the Downloads folder and select Properties.
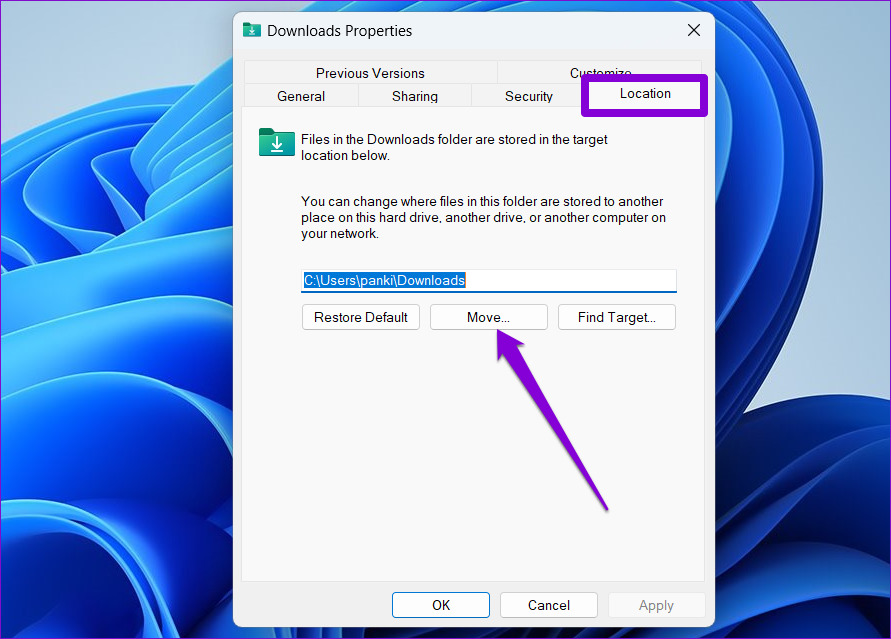
Step 5: In the Downloads Properties window, head over to the Location tab and click on Move.
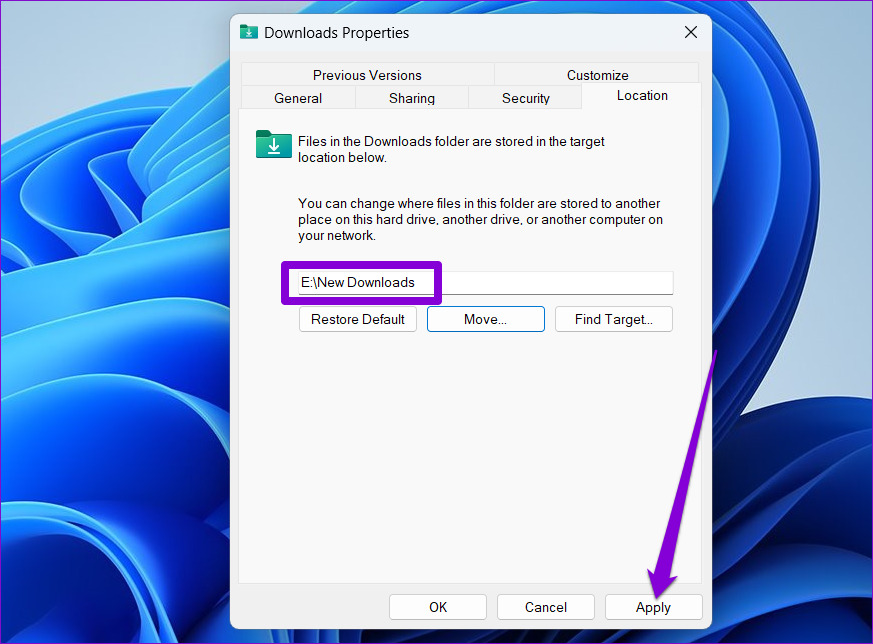
Step 6: Next, navigate to the newly created folder. Hit Select Folder.
Step 7: Click on Apply to save changes.
As you do that, a prompt will appear. Windows will ask whether you’d like to move your existing files in the Downloads folder to the new location. When you select Yes, the transfer will commence. It may take a while depending on the size of the folder.
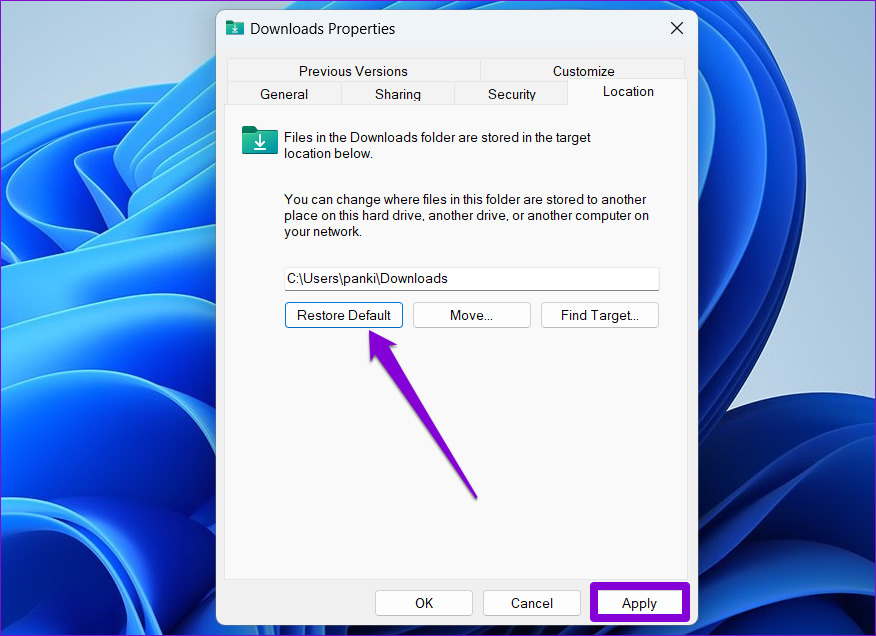
You can always move the Downloads folder to its original location later. To do so, open the properties of the Downloads folder, and click on Restore Default under the Location tab before hitting Apply.
Although we only talked about Windows 11, you can employ the same steps on older versions of Windows to move the location of the Downloads folder. Alternatively, you can also change the default download location for Chrome, Microsoft Edge, or any other browser you might be using by accessing its settings menu.
Manage Your Downloads
It’s convenient how Windows 11 allows you to change the default download location for various file types in simple steps. This makes it easy to manage your storage space and keeps your main drive from getting cluttered with non-essential files. Running low on storage space? Read our guide to clear unwanted cache files on Windows PC for reclaiming valuable storage space. The above article may contain affiliate links which help support Guiding Tech. However, it does not affect our editorial integrity. The content remains unbiased and authentic.

