While Apple tries to bridge the gap between macOS and iOS, the new app is a welcome change. We will show you how to use the Clock app and its different features on your Mac.
Clock App Requirements
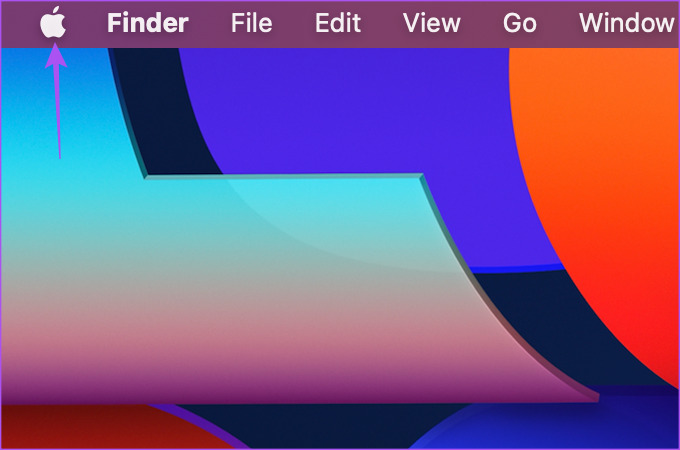
To enjoy the new Clock app, your Mac needs to run at least macOS Ventura or higher. If you’re yet to install the update, grab it from the System Preferences menu. Here’s how you can check for the macOS update. Step 1: Click the Apple logo in the top-left corner.
Step 2: Click on About This Mac.
Step 3: Click on Software Update.
Step 4: Download and install the macOS Ventura update.
Let us now show you how to use the different features of the Clock app on your Mac.
1. World Clock
As the name suggests, the World Clock lets you check the Time Zone of any city or area of your choice across the globe. You can add more than 4 clocks of different time zones using the Clock app compared to the Clock Widget that previously showed four different time zones. This also saves you the hassle of checking the time in a different city by opening the web browser on your Mac. By default, you will see the Time Zone of your country. Here’s how you can add a new area or city in World Clock. Step 1: Press Command + Spacebar to open Spotlight Search, type Clock, and press Return.
Step 2: Click the World Clock tab at the top of the Clock app.
Step 3: Under World Clock, click the Plus icon at the top-right corner of the app.
Step 4: Type the name of the city in the Search Bar.
Step 5: Click on the search result to add its Time Zone. You will notice the clock for your selected area has been added at the bottom with your current Time Zone clock.
To remove the clock of a particular time zone, hover your mouse pointer on that clock and click the X icon in its top left corner.
2. Alarm
The second important feature that the Clock app offers is setting an Alarm on your Mac. Besides your iPhone or Android, you can also use the Clock app on your Mac to set alarm for important work or reminders. Here’s how to set an Alarm on your Mac. Step 1: Press Command + Spacebar to open Spotlight Search, type Clock, and press Return.
Step 2: Click the Alarm tab at the top of the Clock app.
Step 3: Under the Alarm tab, click the Plus icon at the top-right corner.
Step 4: Choose your Alarm Time, Repeat Day, Label, and Sound.
Step 5: Click on Save to set your Alarm.
Your preferred Alarm will be visible under the Alarm tab. To disable the Alarm, click the yellow toggle.
To delete the Alarm, hover your mouse pointer on the Alarm and click the X icon in its top-left corner.
3. Stopwatch
Besides the Alarm, you also get to use the Stopwatch feature. That’s helpful if you are working on tight deadlines or want to finish your assignment quickly. You can instantly start the Stopwatch from the Clock app. Here’s how to use it. Step 1: Press Command + Spacebar to open Spotlight Search, type Clock, and press Return.
Step 2: Click the Stopwatch tab at the top of the Clock app.
Step 3: Click on Start at the bottom.
You can also record a Lap while using the Stopwatch.
Step 4: Click on Stop at the bottom to pause the timer.
You can also Reset the Stopwatch.
4. Timer
While taking a quick coffee or tea break from the screen, you can set a Timer to remind you to return to your desk. Instead of picking up your iPhone or Android, you can set a Timer on your Mac to resume your work quickly. Also, it’ll help you manage your breaks to get up from the chair and stretch instead of working for long hours. Here’s how to use it. Step 1: Press Command + Spacebar to open Spotlight Search, type Clock, and press Return.
Step 2: Click the Timer tab at the top of the Clock app.
Step 3: Select the duration and sound of the Timer.
Step 4: Click on Start at the bottom.
You can click on Pause or Done to stop the Timer as per your choice.
Take Charge of Time
The Clock app is a welcome change for Mac users as they don’t have to download any third-party Clock apps or rely on their phones. macOS Ventura brings another cool update which is called Continuity Camera. You can read our post to know how this feature lets you use your iPhone as a Webcam for your Mac. The above article may contain affiliate links which help support Guiding Tech. However, it does not affect our editorial integrity. The content remains unbiased and authentic.
