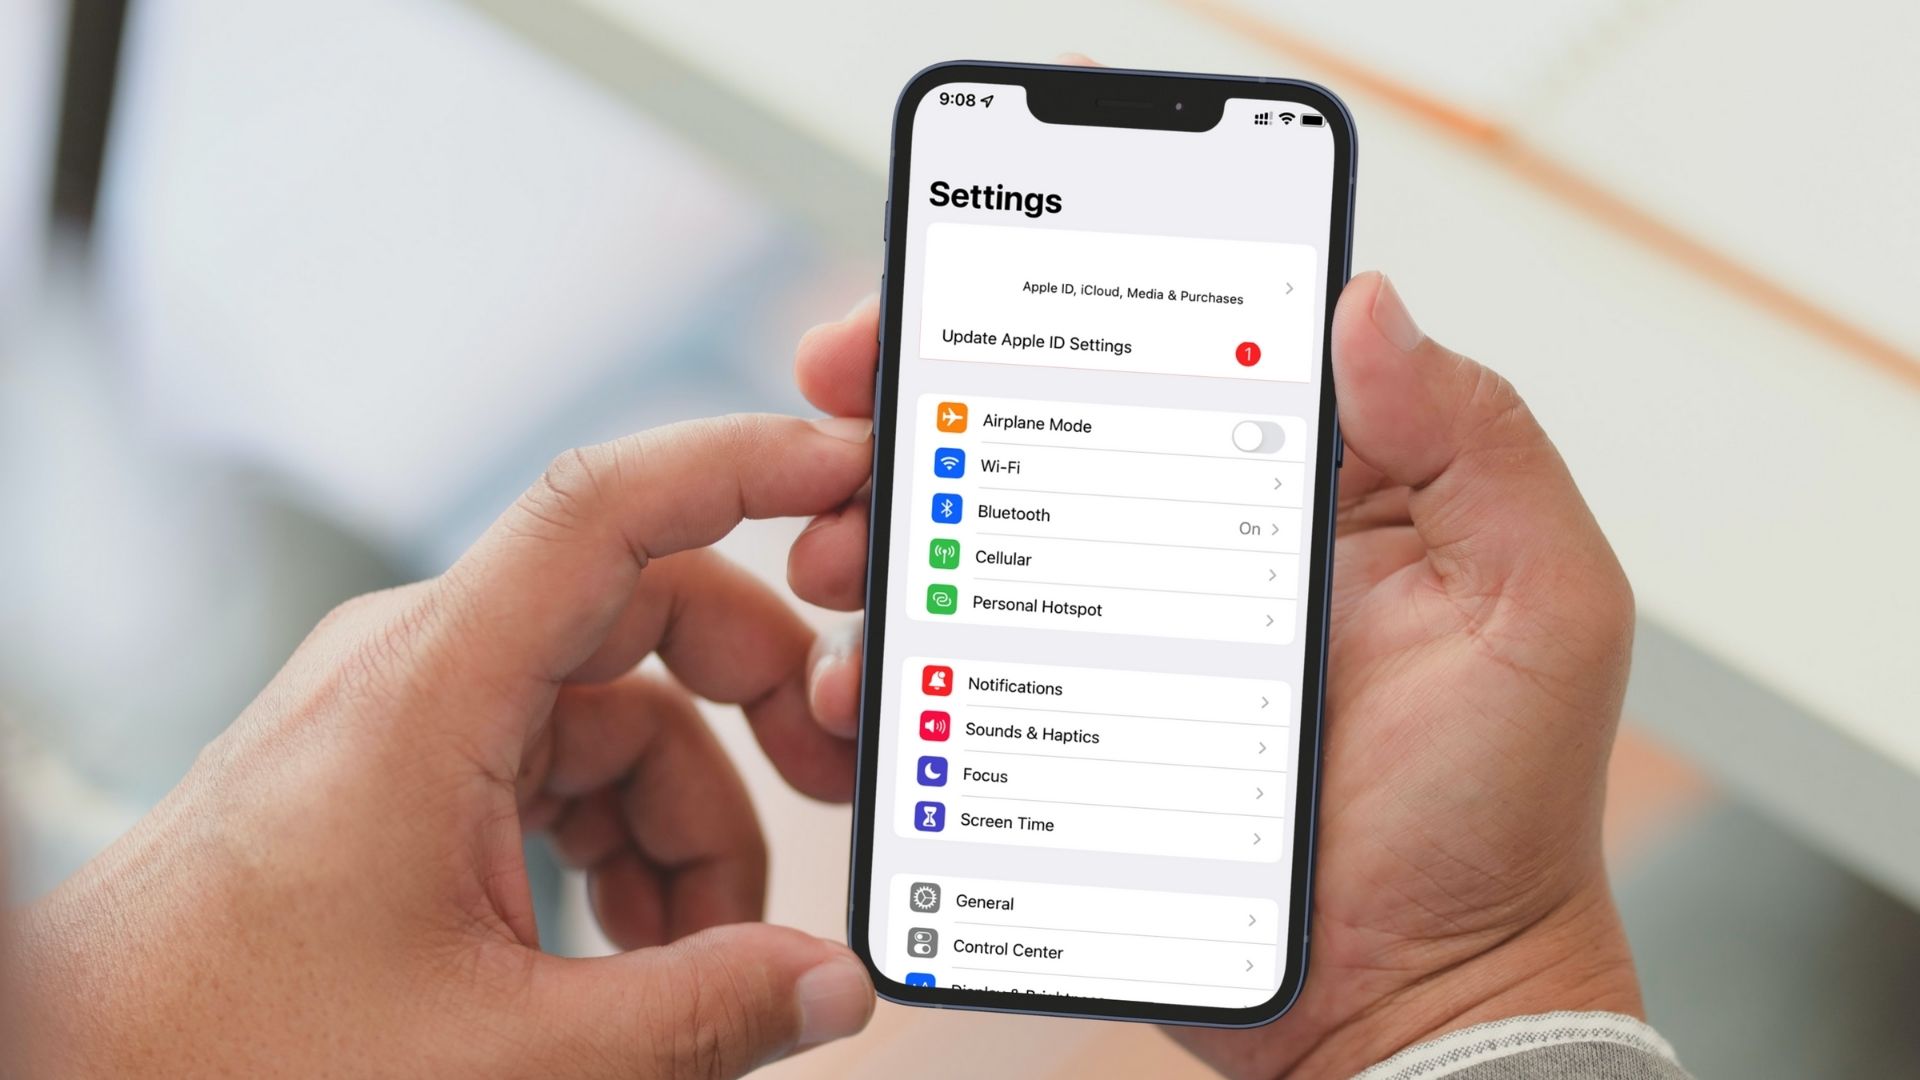
In this post, we’ll share a few troubleshooting tips that should help discard the ‘Update Apple ID Settings’ notification on your iPhone with ease. So, let’s get started.
1. Enter Your Apple ID Password
You can start by doing what your iPhone asks – update your Apple ID settings. Most of the time, verifying your current Apple ID password is all it takes to get rid of the ‘Update Apple ID Settings’ notification. Hence, you should start with that. Step 1: Launch the Settings app on your iPhone and tap on the ‘Update Apple ID Settings’ notification. Then hit Continue.
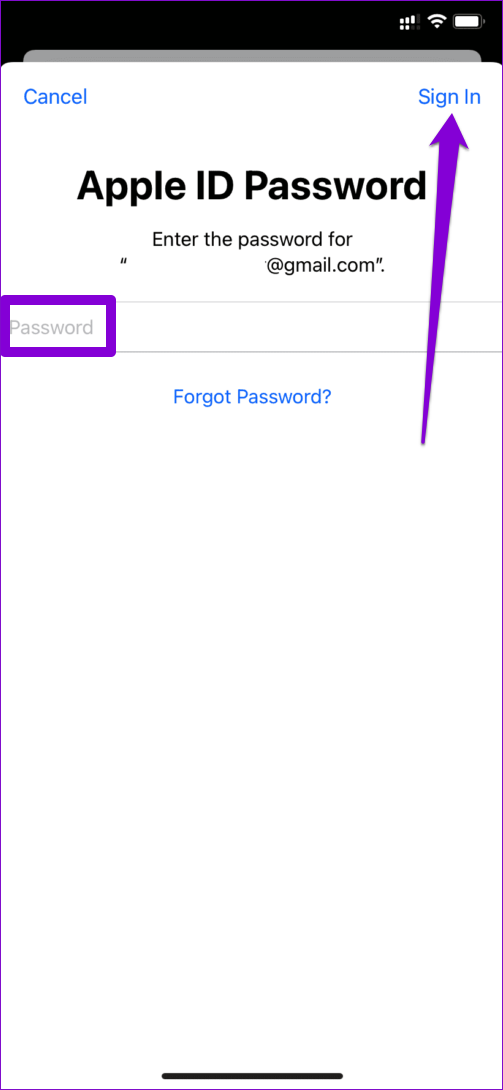
Step 2: Enter your Apple ID password and tap on Sign In.
Step 3: Once verified, swipe up from the bottom of the screen (or press the Home button twice on older iPhones) to bring up the App Switcher. Swipe up on the Settings app to close it.
Open the Settings app again to see if the notification bubble is gone.
2. Check If You’re Using The Right Apple ID
If you’ve multiple Apple IDs, you’ll need to double-check the Apple ID you’re using on your phone. There’s a chance that you’re failing to verify your Apple ID settings only because you’re entering the wrong password. Open up the Settings app and tap on your name at the top. You’ll find the Apple ID you’re currently using at the top.
3. Sign Out and Sign In
Another way to get rid of the ‘Update Apple ID Settings’ notification is by signing out and signing back in. It’s a good idea to create a fresh session with your account details. That’ll help if you signed in after changing your Apple ID password and iPhone hasn’t synced the change. Hence, you shouldn’t skip this solution. Step 1: Open up the Settings app on your iPhone and tap your name at the top.
Step 2: Scroll to the bottom of the page and tap on Sign Out. Optionally, you can retain a copy of specific data on iPhone using the toggles. Next, tap on Sign Out in the top right corner.
Sign back in with your Apple ID credentials and then check if the ‘Update Apple ID Settings’ notification is gone.
4. Update Apple ID Information
If your Apple ID information like the payment details such as the credit or debit cards needs updating, your iPhone might bother you with the ‘Update Apple ID Settings’ notification. So try checking your Apple ID’s payment methods from your iPhone. Step 1: Open up the Settings app on your iPhone and tap your name at the top. Step 2: Go to Payment & Shipping.
Step 3: If any of your added cards have expired, tap on Add Payment Method and follow the on-screen instructions to append a new payment method.
5. Reset Your Password
Changing your current Apple ID password is yet another thing you can try to resolve this error. Updating the new password on all your Apple devices can be a hassle, but it’s definitely something worth trying. To reset your Apple ID password on your iPhone, follow the steps mentioned below. Step 1: Launch the Settings app on your iPhone and tap on your name at the top.
Step 2: Go to Password & Security and tap on Change password.
Step 3: Set a new password for your Apple ID by entering it twice. Lastly, tap on Change.
6. Update iOS
Several users reported seeing the ‘Update Apple ID Settings’ notification after an update. If the issue has only occurred due to a bug within iOS, then updating to a newer version should help. Besides, it’s good practice to keep your iPhone updated to safeguard it from any security loopholes. To check for updates on iPhone, open the Settings menu and navigate to General. Then tap on Software Update.
Download and install any pending iOS updates.
Cause for Concern
Getting rid of the ‘Update Apple ID Settings’ error can be as easy as entering your password or as demanding as resetting it. However, it’s important to pay attention to this error and not ignore. One of the above solutions should work out for you to fix the error. Let us know which one did the trick in the comments section below. The above article may contain affiliate links which help support Guiding Tech. However, it does not affect our editorial integrity. The content remains unbiased and authentic.


