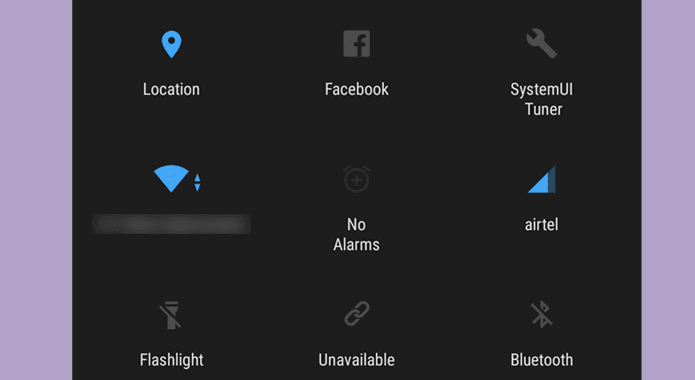
Go through the solutions mentioned below to resolve the issue if you can’t seem to toggle things like Wi-Fi, Bluetooth, and brightness because the Quick Settings panel isn’t working.
1. Restart Windows Explorer
Windows Explorer facilitates the graphical interface for several utilities, including the Quick Settings panel. So, if the Quick Settings panel isn’t responding, you can start by restarting Windows Explorer. Here’s how. Step 1: Press Ctrl + Shift + Esc keyboard shortcut on your keyboard to quickly launch the Task Manager. Step 2: In the Processes tab, locate Windows Explorer on the list. Right-click on it and select Restart.
Once restarted, try accessing Quick Settings to see if they work alright.
2. Run SFC and DISM Scan
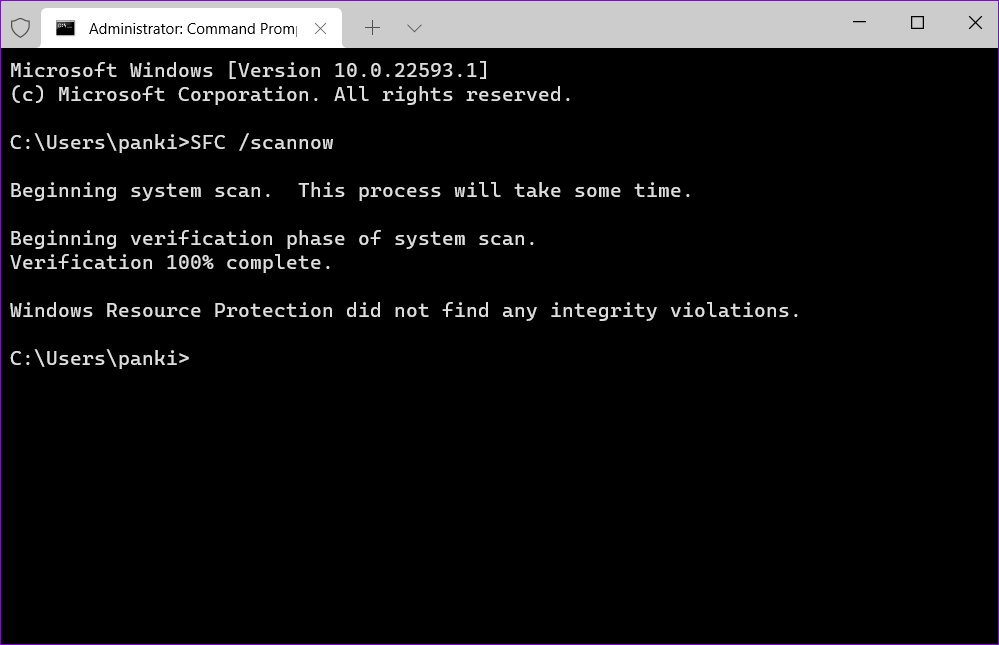
Issues with your PC’s system files can lead to such anomalies on Windows. Fortunately, Windows 11 comes equipped with a handy SFC (or System File Checker) scan that can fix any corrupted or missing system files on its own. You can use it to get Quick Settings to work again. Step 1: Press the Windows key + X shortcut and select Windows Terminal (Admin) from the resulting menu.
Step 2: In the console, paste the command given below and press Enter.
After the scan completes, a message will appear indicating if there were any problems that need further fixing on your drive.
If the SFC scan fails to find any irregularities, you’ll need to run the DISM (or Deployment Image Servicing and Management) scan. Launch Windows Terminal with admin rights again and run the following commands consecutively and press Enter after each one.
After that, restart your PC and see if you can use Quick Settings.
3. Re-Register Action Center
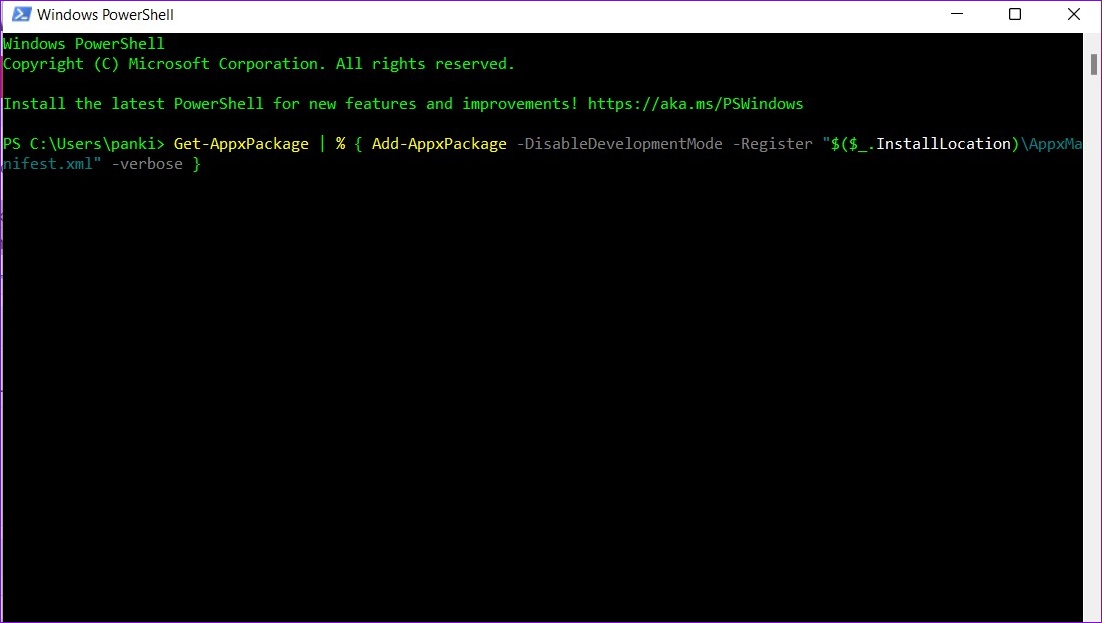
Problems with the Action Center can also prevent you from using the Quick Settings panel. To fix it, you’ll need to re-register the Action Center on Windows by following the steps below. Step 1: Click on the search icon on the Taskbar, type in windows powershell, and select Run as administrator.
Step 2: Copy and paste the command mentioned below and press Enter to run it.
After executing the command, reboot your PC and try using Quick Settings again.
4. Check Windows Services
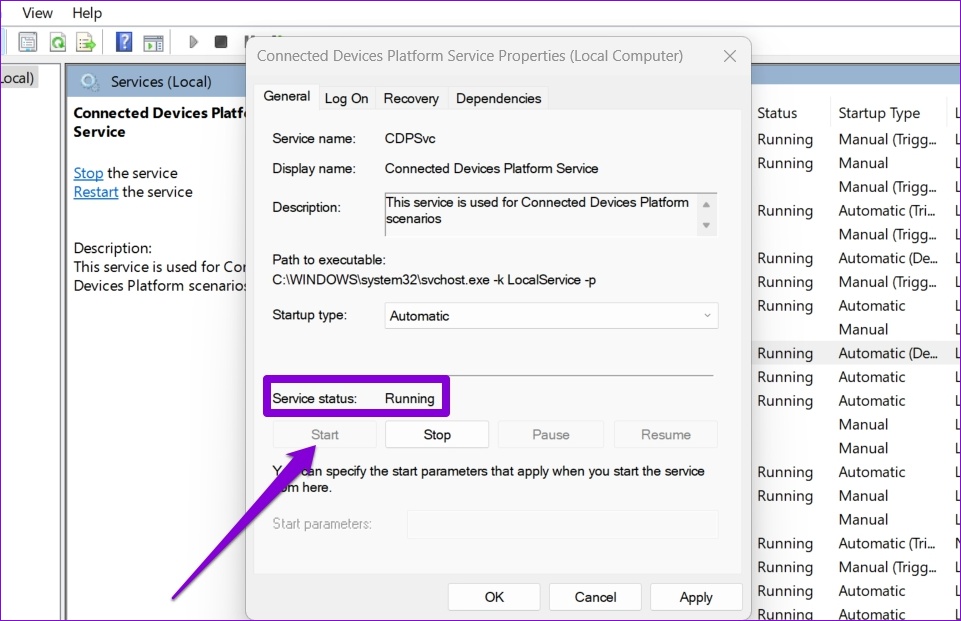
Windows Services are essential programs that enable and facilitate certain features on your PC. Connected Devices Platform is one such service that needs to be running for you to access and use Quick Settings. If this service is disabled, you’ll need to enable it by following the steps below. Step 1: Press the Windows key + R to launch the Run dialog box, type in services.msc, and press Enter.
Step 2: Locate the ‘Connected Devices Platform Service’ from the list of services. Double-click on it to open its Properties.
Step 3: Use the drop-down menu next to Startup type to select Automatic and hit the Apply button.
If the service is still not running, click on the Start button on the same window to run it.
5. Tweak Registry Editor
If you’re up for some tricky work, you can tweak registry files to fix the Quick Settings panel on Windows 11. It’s important to know that Registry Editor carries critical files for Windows and its apps. Hence, you should proceed with caution and spare time to backup your registry files before making any changes. Step 1: Press the Windows key + R to open the Run dialog. Type in regedit and press Enter.
Step 2: Use the address bar at the top to navigate to the following key:
Step 3: Right-click on the Explorer key, select New from the menu, and select DWORD (32-bit) Value. Name it NoControlPanel.
Step 4: Double-click on the newly created DWORD and change its value data to 0 (zero) and hit OK.
Restart your PC for changes to take effect and try using Quick Settings again.
6. Create New User Account
If the issue remains, then it might be the case of your user account files being corrupted. In that case, your only option is to create and switch to a new user account on Windows. Here’s how you do it. Step 1: Press Windows key + I to launch the Settings app. Step 2: Navigate to the Accounts tab and click on the Family & other users.
Step 3: Under Other users, click on the Add account button.
Step 4: Next, type in your recovery email address or click ‘I don’t have this person’s sign-in information’ if you plan to use a local account later.
Follow the on-screen instructions to create a new user account on Windows. Once created, log in with the newly created user account and see if you can use Quick Settings.
7. Update Windows
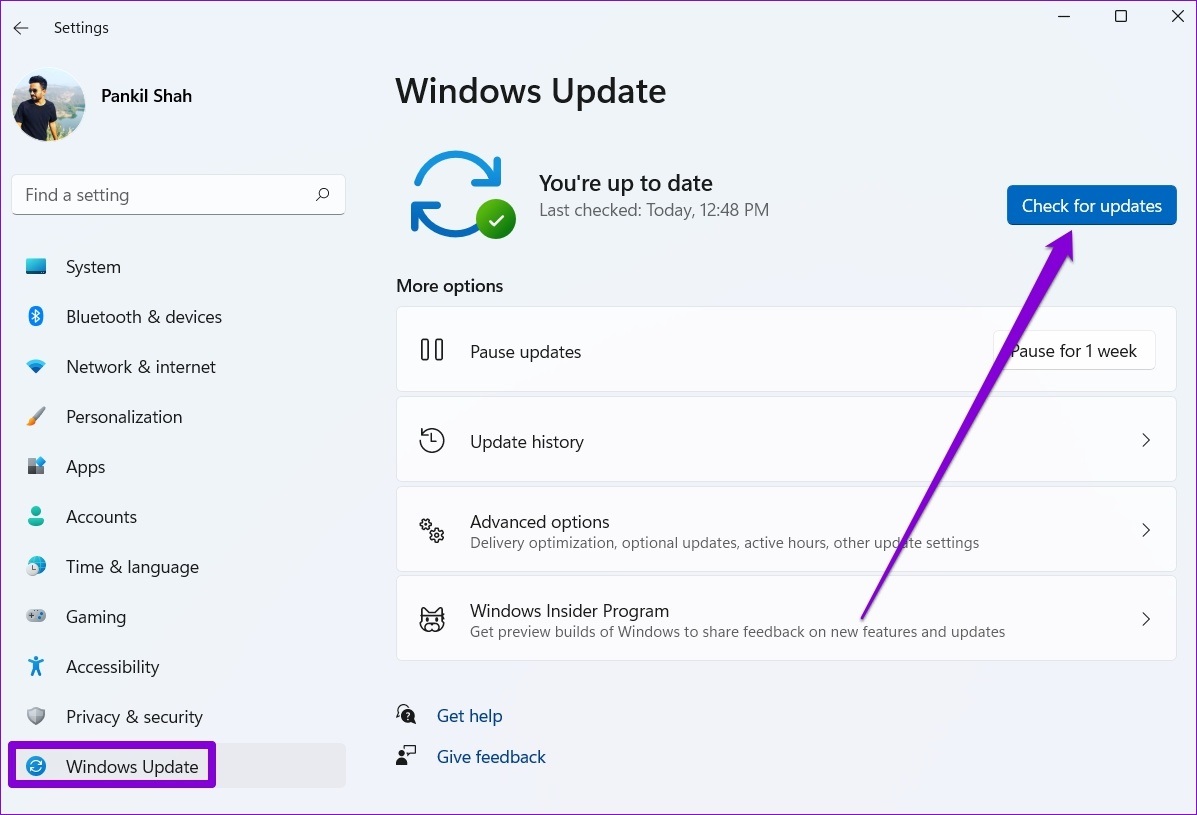
If you have been ignoring Windows updates for a while, you could be using one of the earlier builds of Windows 11. You should install any pending Windows updates right away and see if that gets the Quick Settings to work. Press the Windows key + I to launch the Settings app and navigate to the Windows Update section to download and install any pending updates.
8. Perform System Restore
Lastly, if nothing works, you can use System Restore to move back to a point before the issue first appeared. Here’s how. Step 1: Open the Start Menu, type in create a restore point and click on the first result that appears.
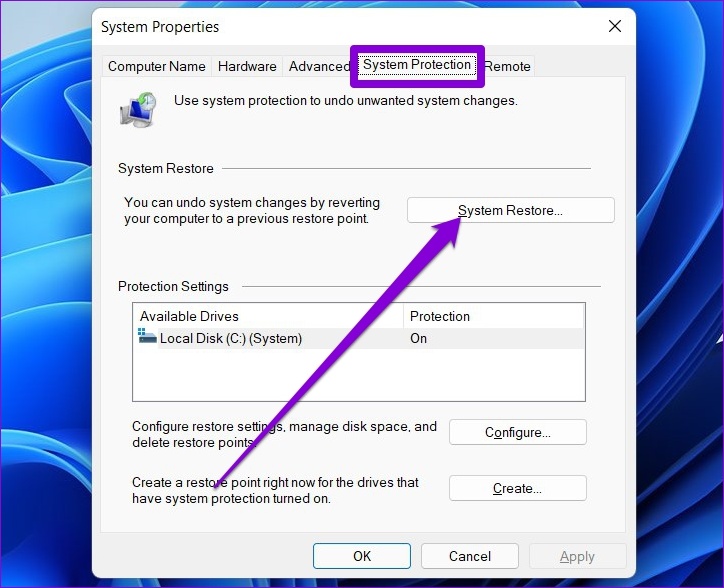
Step 2: Go to System Protection tab, and click on the System Restore button.
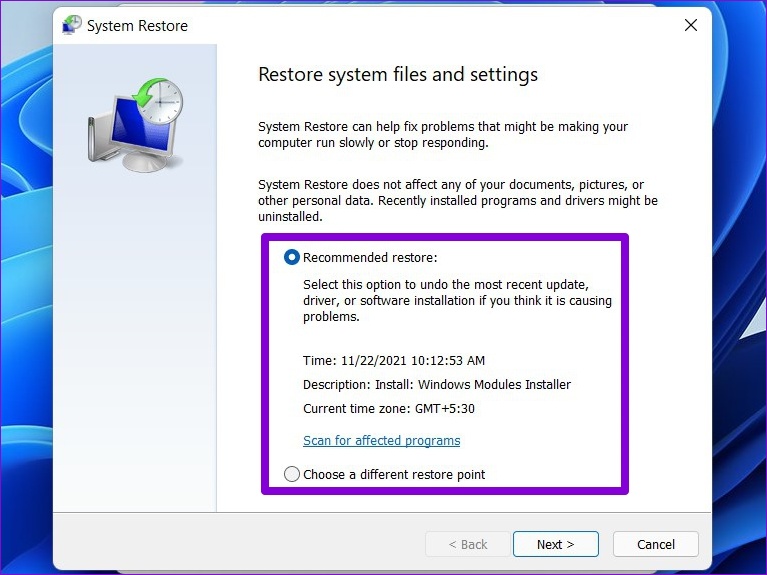
Step 3: You can either go with the Recommended restore point or pick one yourself. Once selected, hit Next.
From there, follow the on-screen instructions to perform the system restore.
As Quick As It Gets
The Quick Settings panel can come in handy if you’re looking to make minor changes without walking through the extensive menus. However, it can be frustrating when those Quick Settings fail to work as intended. Hopefully, going through the above fixes has helped you fix any irregularities with Quick Settings on Windows. The above article may contain affiliate links which help support Guiding Tech. However, it does not affect our editorial integrity. The content remains unbiased and authentic.


